TL;DR: the complete code to implement such a solution can be found here.
Lambda URLs provide a simple way to expose your Lambda functions via direct HTTP(S) requests. Compared to the more robust API Gateway approach
, they offer several advantages:
- Minimal configuration effort
- No additional cost
- 15-minute request timeout (1)
However, this simplicity comes with trade-offs. Lambda URLs lack advanced features such as caching and throttling, and they only offer a single access control mechanism: IAM-based authentication. This authentication method is easy to implement for service-to-service communication, but not simple to use for direct users.
In this article, we’ll look at how to secure Lambda URLs using IAM access control, while aiming for a solution that remains simple and easy to manage. The approach outlined here relies on CloudFront and Lambda@Edge.
IAM Access Control
By default, Lambda URLs are not protected: anyone with the URL can make an HTTP request. This can be prevented by using the AWS_IAM AuthType mode.
When using this mode, all requests must contain a header with a signed hash of the request content. This hash will be used to authenticate the sender and check if they have the necessary IAM permissions to make that request. The signing can be done either using custom code, or by using one of the AWS SDKs, which all contain several methods to simplify this process.

The next question is: how to authenticate the user and add this authentication header? If the request is sent by another service, the answer is simple: use the AWS SDK to automatically add this signature and give that service the necessary IAM permissions.
However, if you expect your users to call the Lambda URL from a browser, then you need an alternative since there is no out-of-the-box way to sign in a user into IAM and generate that signature directly in the browser.
Solution
We will implement a solution that relies on the following services:
- IAM: authentication and authorization
- Cognito: user account management and login
- Lamda@Edge: to check the user's Cognito token and sign the request using an IAM Signature V4
- CloudFront: call the Lambda@Edge for each request
- CDK: infrastructure deployment
We will use TypeScript for the CDK code and the Lambda, but stick with plain JavaScript for the Lambda@Edge, since the CDK construct allowing us to deploy it does not include any advanced packaging features nor TypeScript support.

Process
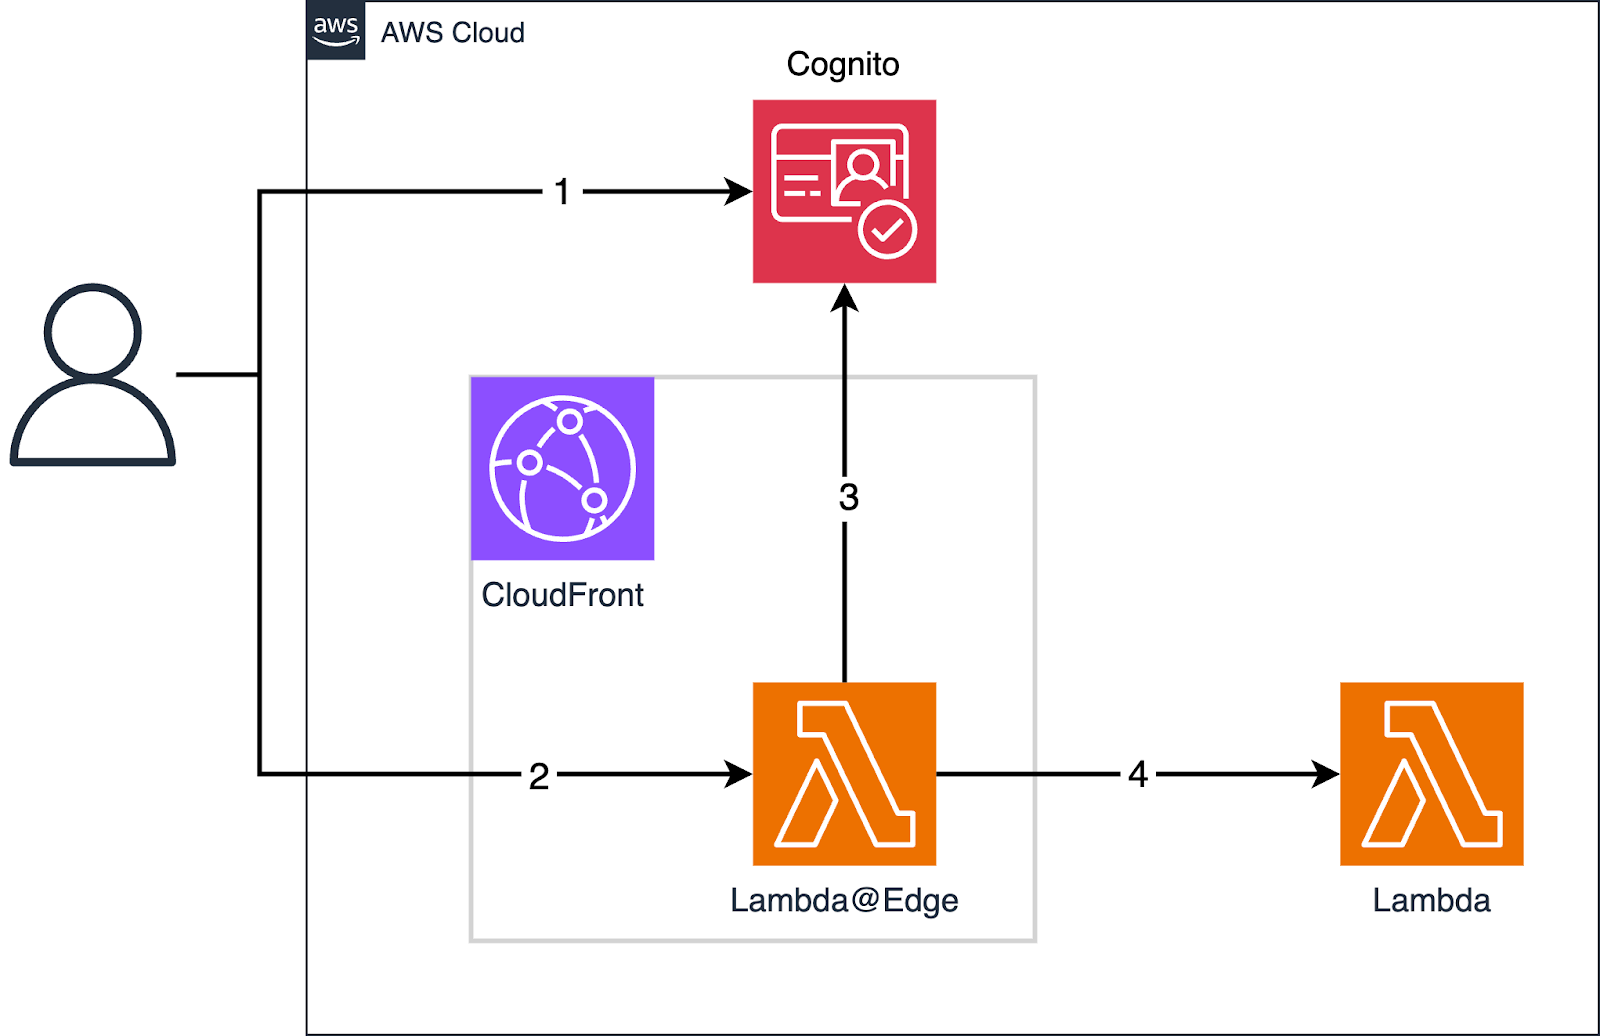
- The user accesses the Cognito self-hosted UI and signs in to obtain a token
- They send a request to the CloudFront endpoint, with the Authentication header set with the Cognito token
- The Lambda@Edge intercepts the requests and verifies the Cognito token
- The Lambda@Edge forwards the request to the backend Lambda and returns the result to the user
Implementation
You can find the complete code and file structure described here on my GitHub repository.
The backend Lambda
We will start by creating a simple Lambda function that returns a small JSON, and the associated CDK deployment code. We will be using the NodejsFunction construct which simplifies Lambda deployments with several useful features, including the capacity to automatically transpile TypeScript into JavaScript, along with the dependencies, during the packaging.
We will then add a Lambda URL to the backend Lambda, to make it directly reachable via HTTP requests.
Authentication and IAM Signing via Lambda@Edge
Next, we will write the Lambda@Edge code. This function has two main purposes:
- check the Cognito token to verify if the user is authenticated
- sign the request using the IAM v4 signature and pass it along
This function will be written in JavaScript, since the EdgeFunction CDK construct does not have the capacity to handle TypeScript. We also need to add the corresponding package.json file in the same folder to include the dependencies during the deployment. Here at the key parts of this function. Refer to the GitHub repository
for the complete code and package.json file.
We also need the CDK code, which will deploy it to all CloudFront Edges (this can take up to 15 min), and give it permission to invoke the backend Lambda.
CloudFront
We also need a CloudFront distribution to receive all requests, apply caching if necessary and pass the requests to the Lambda@Edge function before sending them to the Origin (the backend Lambda).
Authentication with Cognito
We will now add a Cognito user pool to register our users, and a client
to allow them to log in. The following code is only showing the key parts for our use case. Refer to the file in the GitHub repository
to see the full code.
Note: We will use the URL of the Cognito-hosted UI as a callback URL to avoid having to set up one ourselves for this tutorial. You would normally have to deploy a frontend UI, to which Cognito would redirect after authentication.
SSM Parameters
The final step is to make the Cognito user pool and client IDs available to the Lambda@Edge. Since Lambda@Edge does not support environment variables, the best alternative is to put those values in the SSM Parameter Store.
Deployment
Now that we have everything ready, the next step is to actually deploy this setup. If you have an AWS account, you can try it by using my GitHub repository. Here are the steps, assuming you have a recent version of NodeJS installed locally:
- Clone the repository
- Cd inside the repository, then run npm install
- Make sure that you are logged in into your AWS account/profile in your CLI
- Check your AWS region, the code expects to run in eu-central-1. If you want to use another region, modify it in the bin/cdk.ts and lambda-edge/authEdge.js
- Run npx cdk deploy CdkStack, and select yes when prompted by CDK
- Login into your AWS account console, and find the user pool called “UserPool”.
- Create a new user in that user pool. If you don't know how, use the AWS tutorial
.
If the installation is successful, you will obtain several outputs. Take note of the CloudFrontDistributionURL and CognitoUIUrlWithParameters outputs, as we will need them for the next steps.
Testing
We will now try to call the Lambda function:
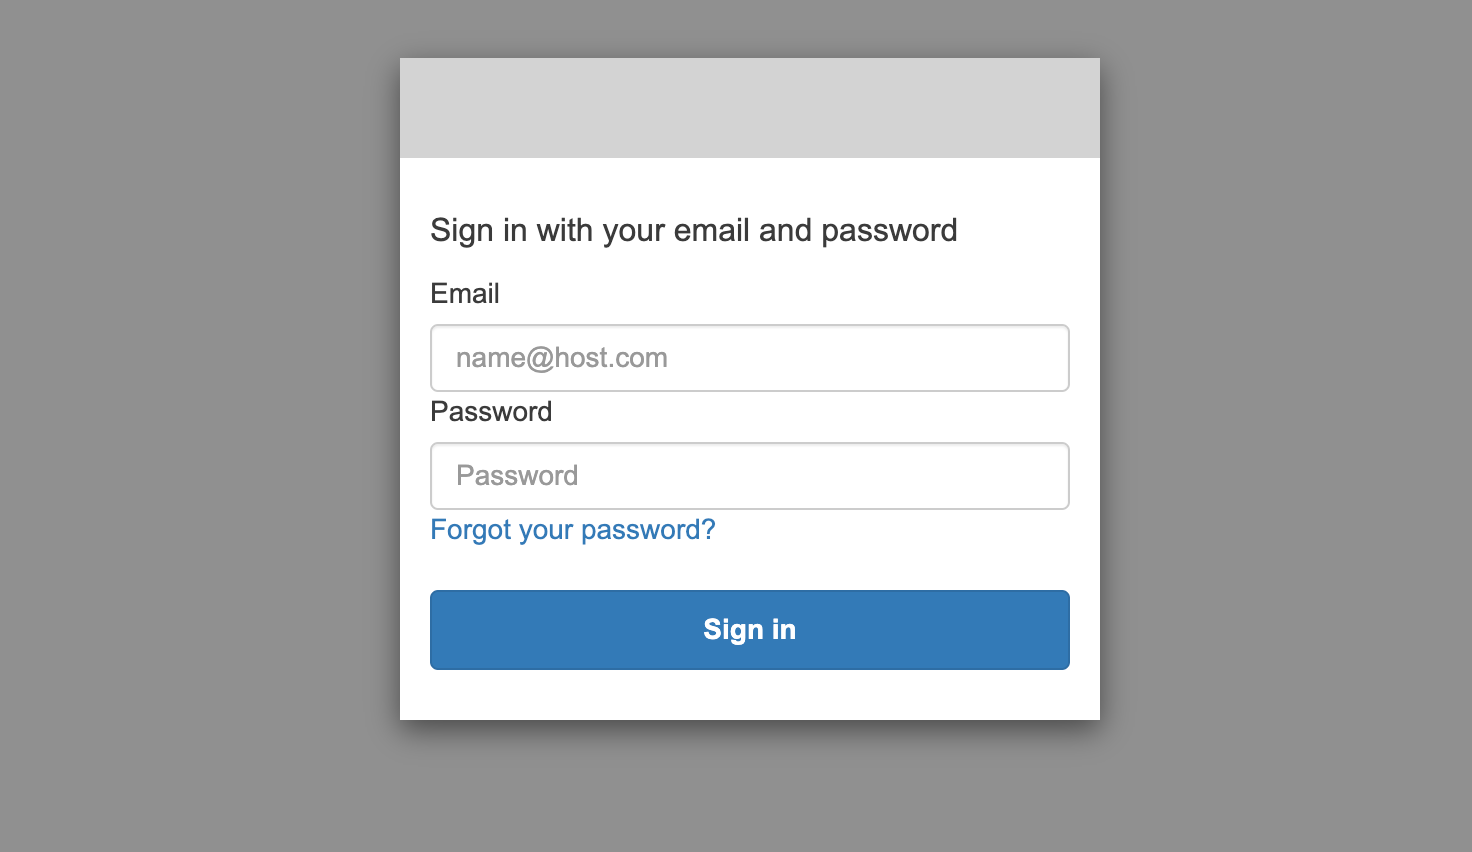
Step 1: Use the URL of the CognitoUIUrlWithParameters output in a browser.

Step 2: Sign-in using the credentials of the user you created in the Cognito user pool
Step 3: This will redirect you to a blank page, where you can find the idToken value in the URL parameters

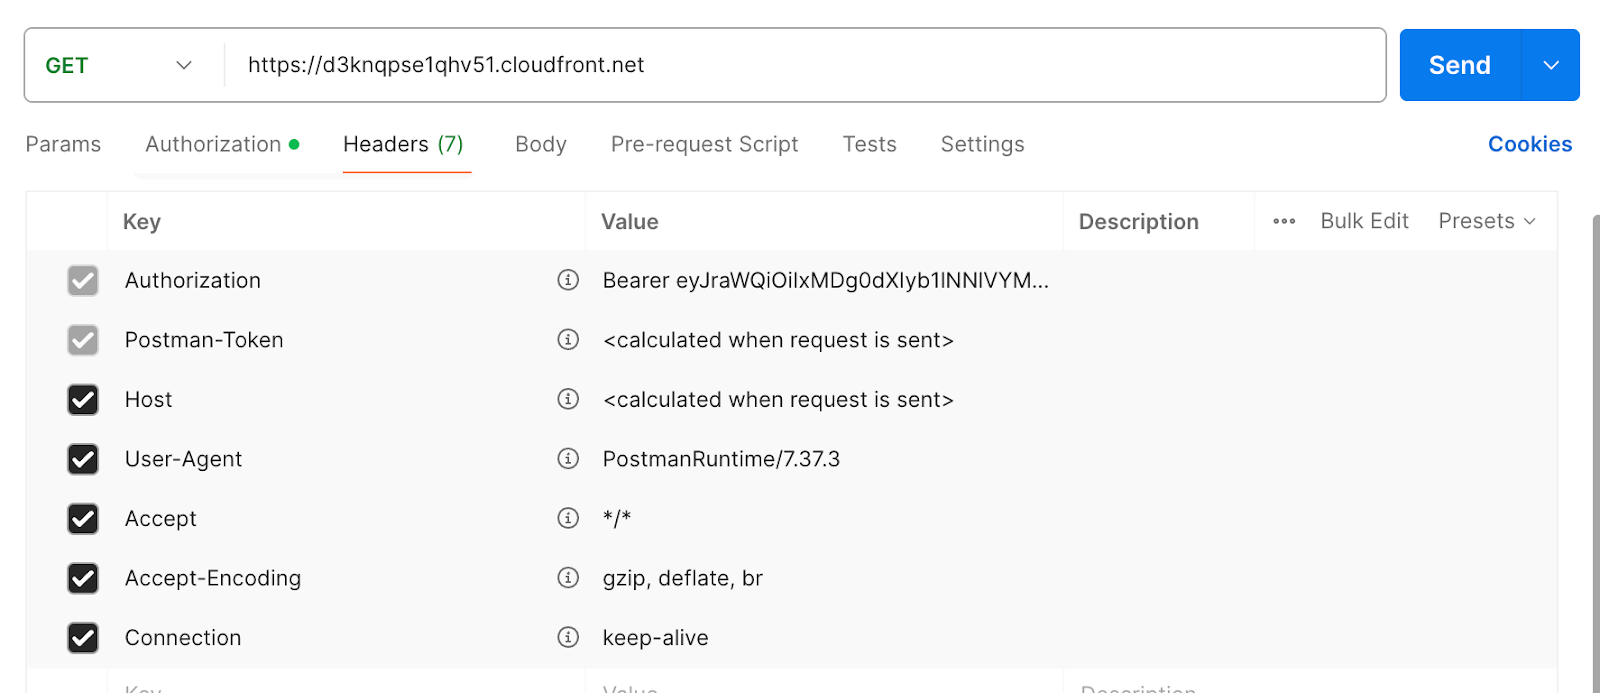
Step 4: Using Postman or Curl, send a GET request to the URL in the CloudFrontDistributionURL output, with the Authorization header set to Bearer {idToken}

If all goes well, you will receive a “Hello World!” JSON message.

Conclusion
Protecting a Lambda URL can be achieved using familiar AWS services like CloudFront and Lambda@Edge, making the process relatively straightforward in terms of concept and implementation. The most challenging aspect lies in signing the HTTP request. Any misconfiguration—such as missing or incorrect headers—can lead to frustrating “403 Forbidden” errors with little to no feedback or error details.
However, adding CloudFront and Lambda@Edge introduces additional complexity and configuration overhead. While Lambda URLs are designed to be simple and cost-effective, this solution undermines those benefits by increasing both the complexity and cost. In particular, the extra configuration steps and increased costs bring this solution closer to the cost of API Gateway.
Previously, one of the key advantages of Lambda URLs over API Gateway was the extended request timeout of 15 minutes, compared to API Gateway's 29-second limit. However, with the recent introduction of extended timeouts in API Gateway, this benefit is now less relevant. API Gateway now offers extended timeout options for specific use cases, making the decision to use Lambda URLs less compelling if long-running requests are a priority.
In essence, leveraging Lambda URLs with CloudFront and Lambda@Edge is only advisable when you already have CloudFront integrated into your infrastructure and don’t want to introduce API Gateway. If API Gateway isn't already part of your setup, this approach could help avoid the costs and effort of maintaining an additional service. With the timeout feature no longer being a significant differentiator however, API Gateway may now be a better fit in most scenarios where you need more built-in features like authentication, throttling, and caching.
(1) this might be less relevant, since API Gateway has recently introduced the option to extend the timeout beyond the usual 29s for specific use cases.