
As mentioned in an earlier article, it is now possible in AppSheet to send dynamic emails to a Gmail account. With dynamic emails, you can complete tasks from a Gmail message and, for example, reply directly to comments in a Google Document. The AppSheet no-code platform lets you build applications without programming skills and is available at no additional cost to Enterprise Plus users of Google Workspace.
In this article we will show you step by step how you can easily implement an internal IT ticketing app from an AppSheet template and integrate dynamic emails there. Thanks to the new function, the employees of your company can therefore create a ticket that is sent to the person responsible as a dynamic e-mail. They can then edit and check off the ticket in the email without having to open the app and leave Gmail.
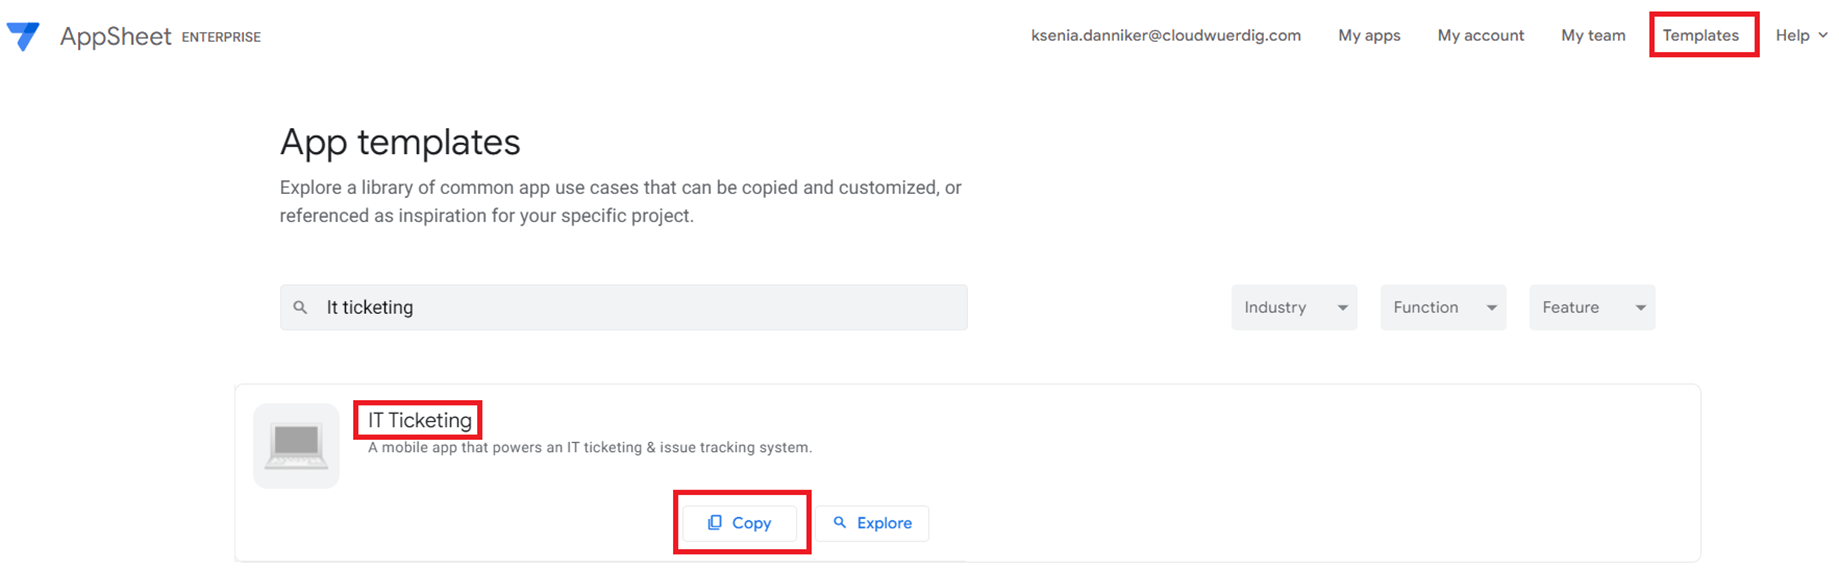
Copy the app template
Navigate to the Templates tab on the AppSheet home page and copy the IT Ticketing application
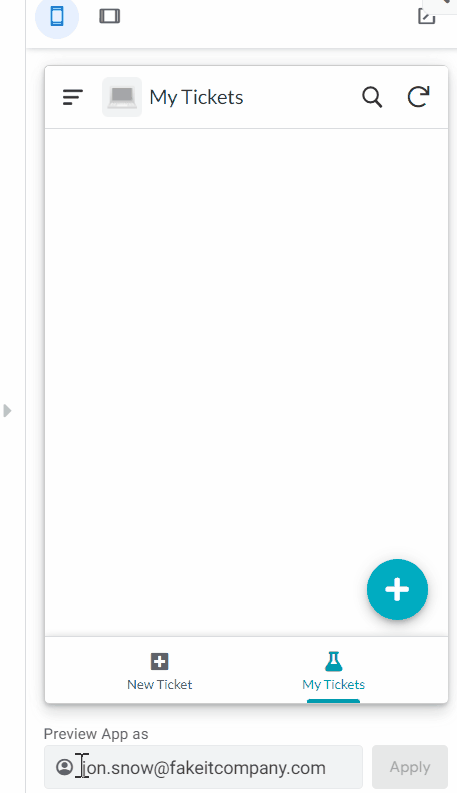
Once the copy is created, go to editing. The ticket form is already ready to use, but the app can be improved with a few small changes. For example, it's handy if employees don't have to enter their data every time they create the ticket, but instead it's automatically populated. To do this, add a spreadsheet to the database with the appropriate data. Refer to it in the form as soon as the employee is logged in with their email address.
Processing of the data
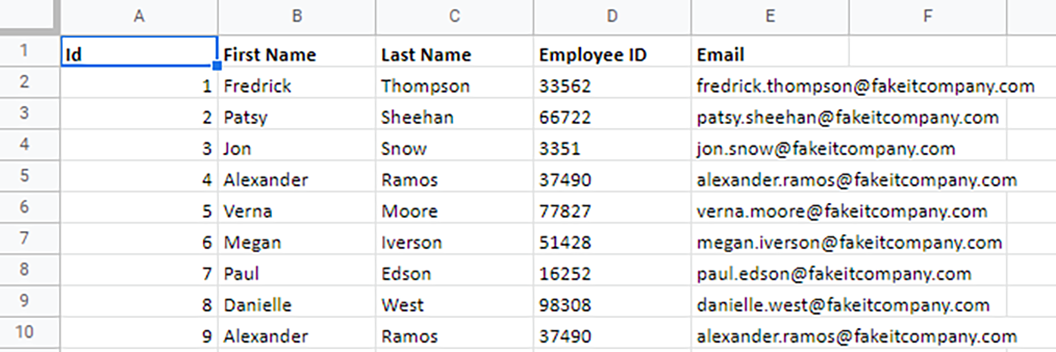
Via the heading Data -> Tables -> View Source (in this case it doesn't matter which table) you open the Google Sheet that serves as your database. Then add an “Employees” worksheet. In this example we copy the information about name, employee ID and email from the "Tickets" sheet and add an Id column to the table.
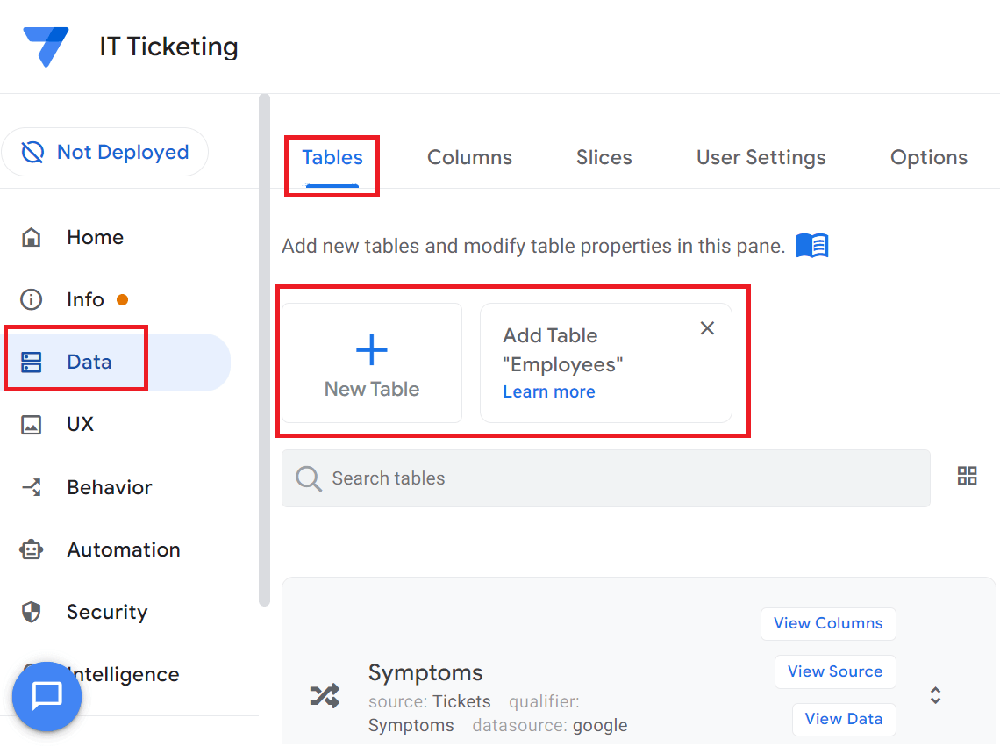
Then add the table to the app (Data -> Tables -> New Table).
Now drag the e-mail address of the logged-in user into the Email column of your form. To do this, store the formula USEREMAIL() when editing this column under Auto Compute -> Initial Value.
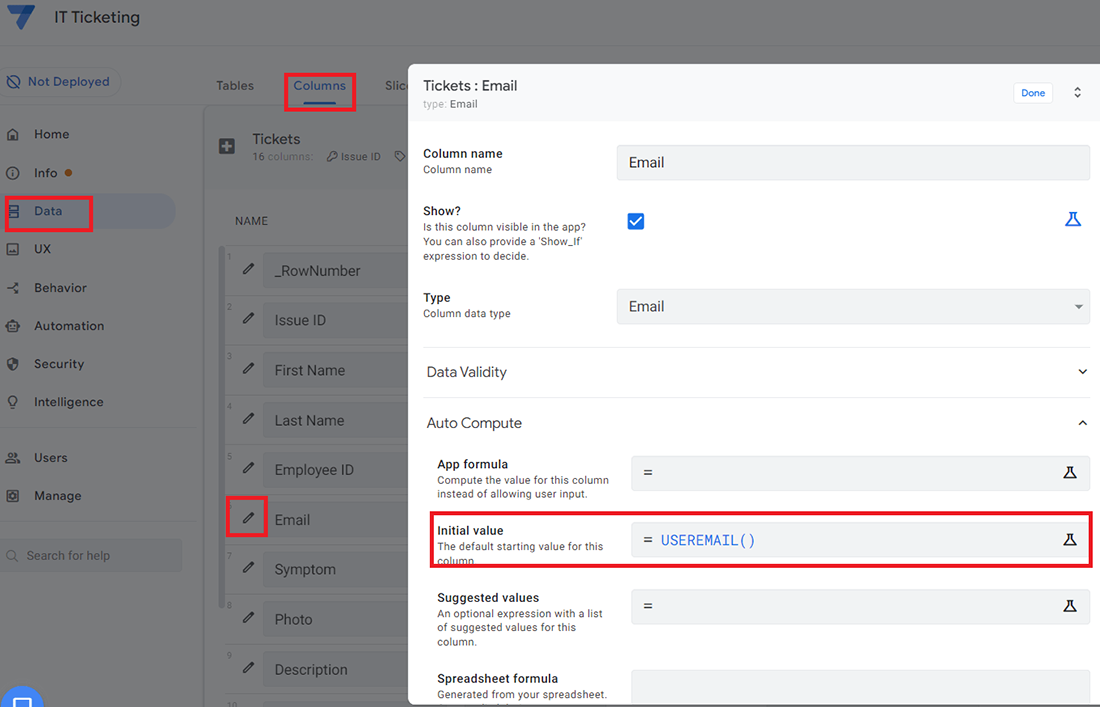
For the remaining columns (First Name, Last Name and Employee ID) you store a formula in the Initial Value. You can pull this from your newly added spreadsheet based on the given email address. This formula can be realised with a LOOKUP or the combination of ANY and SELECT:
LOOKUP([_THISROW].[Email], „Employees“, „Email“, „First Name“)
ANY(SELECT(Employees[Last Name], [Email] = [_THISROW].[Email]))
Since you have columns of two tables with the same name in this example, insert a [_THISROW] before the Email column of the table where we write this formula. Thus, the formula says: "Compare the value from the Email column of this table with the value of the Email column from the Employee table. Where applicable, return from the row the value from the First Name/ Last Name/ Employee ID column." In addition, you can turn off the editability of these columns or hide the columns altogether.
You can also add more columns to the form that the editor can customize in the email. For example, add the status of the ticket. To do this, create the necessary columns in the "Tickets" database. Then confirm the change in the app by clicking on "Regenerate Structure" under the table of the same name.
Setting up dynamic emails
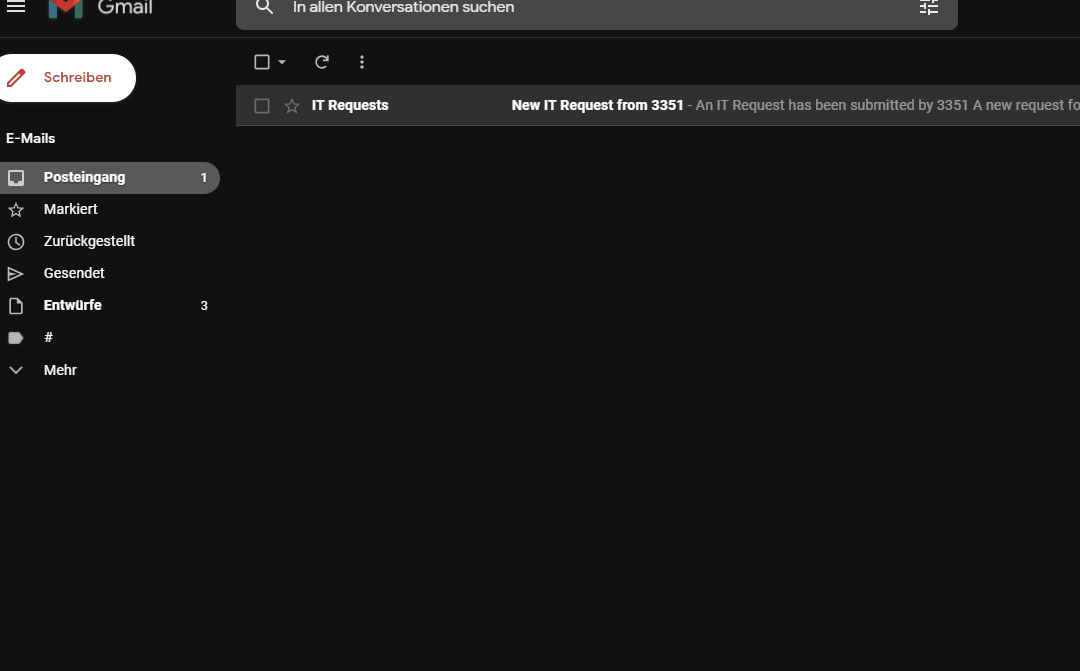
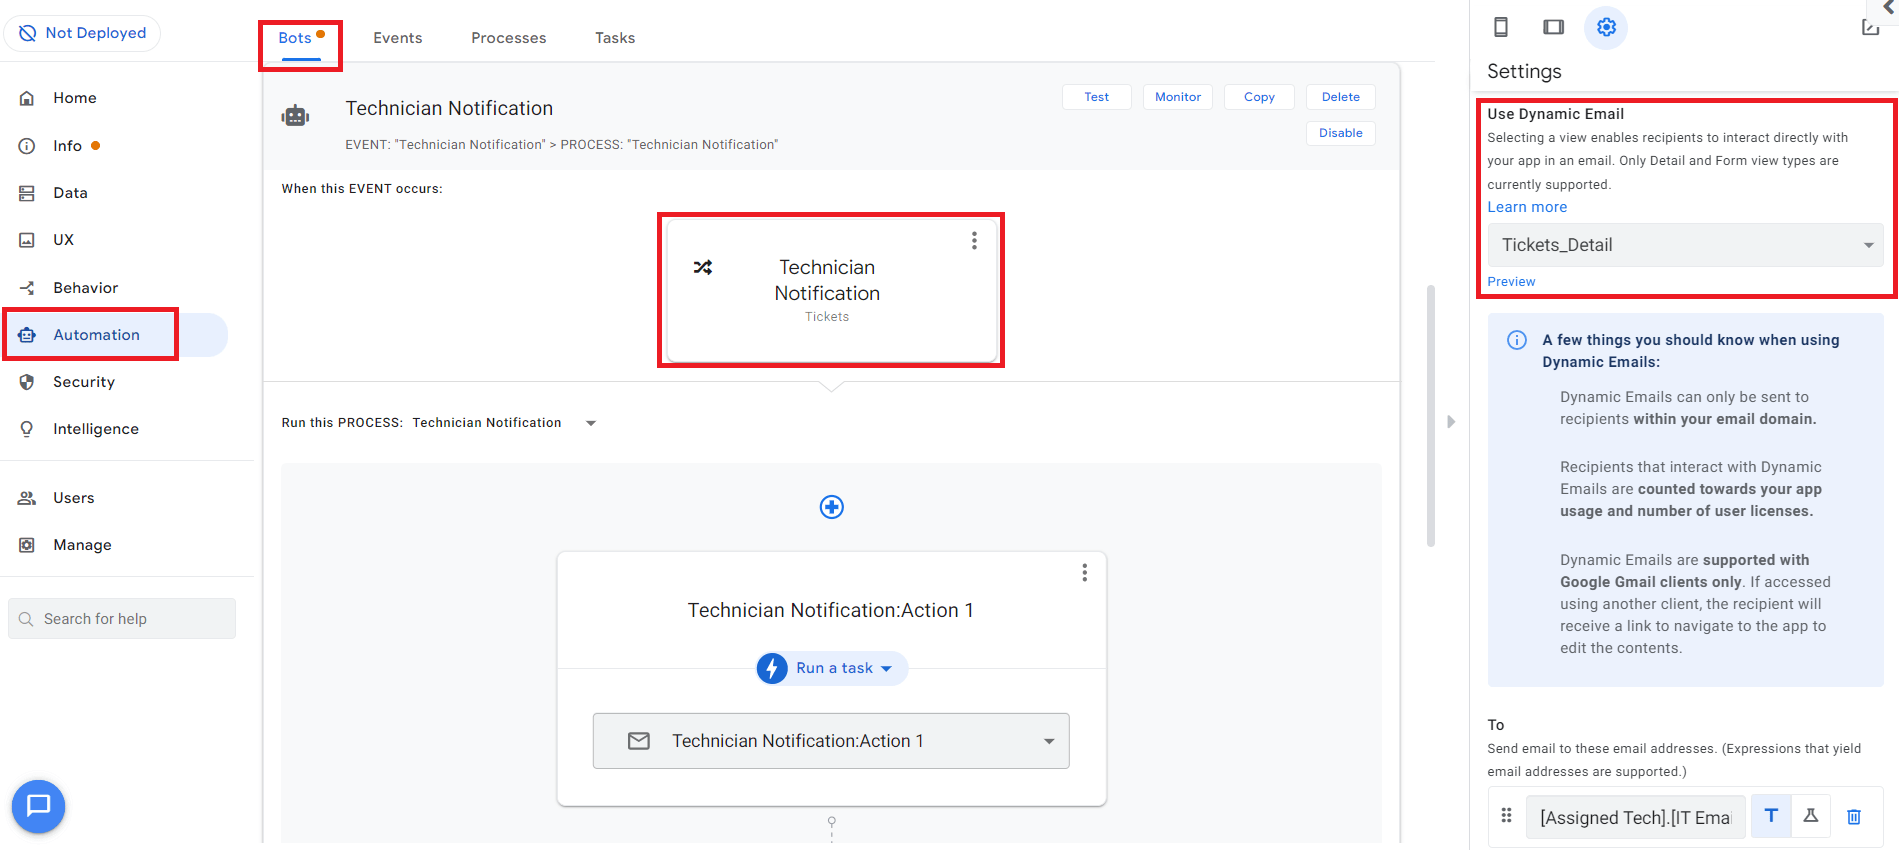
In the app template, under the Automation heading, you will see that automations are already built in. One of them is the Technician Notification, which sends an email to the technician as soon as a new record is saved. In it, you just need to enable the sending of dynamic emails and select the appropriate view form (View) to be sent.
Currently, two view forms are allowed for sending: Details and Form View. The difference is that changes in Details View are saved automatically, whereas in Form View you need to click a button to save the changes. In our case, you can only use the Details View. This is the case because currently the editing of forms that contain the column types "Image" and "Change Timestamp" is not supported. However, as long as you do not set these columns as editable in the Details View, this is allowed.
Navigate to the Settings via Automation -> Technician Notification -> PROCESS and select the Tickets_Detail view under "Use Dynamic Email". You can keep the rest of the email setting or adjust it if necessary.
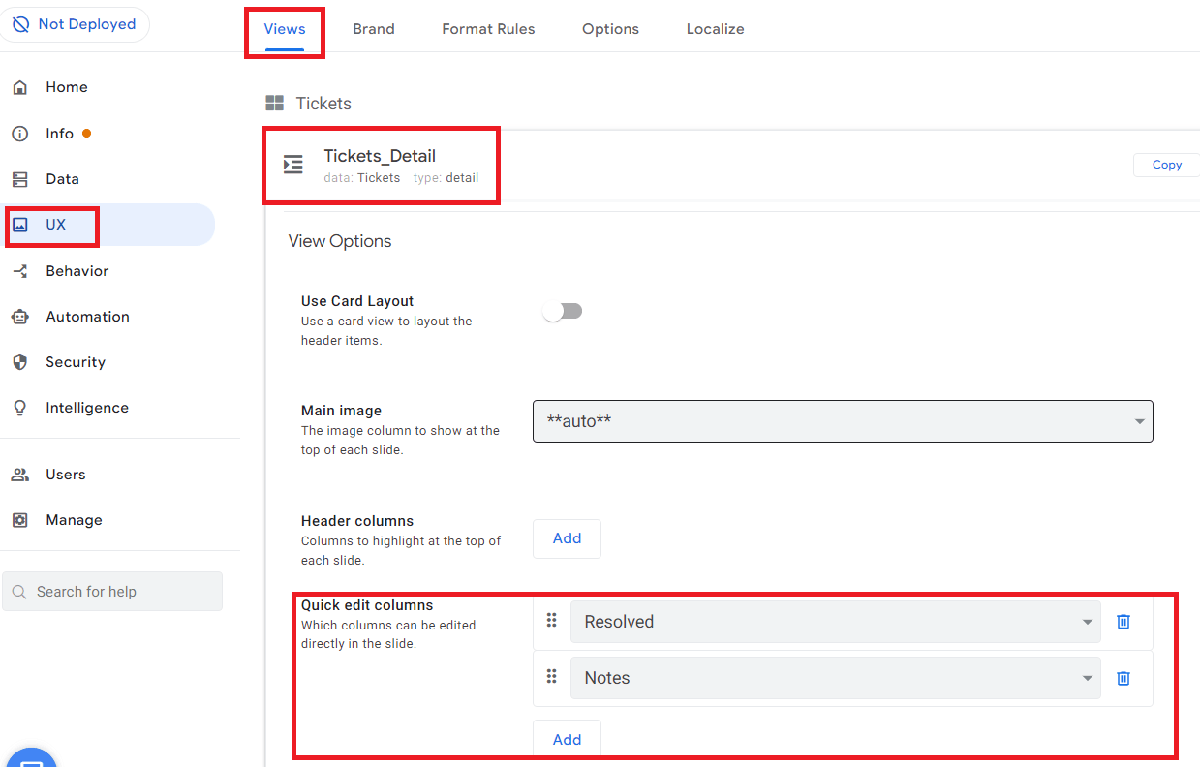
What you have to do now is to specify the selected view form where you want to make fields editable in the dynamic email. Not all columns are automatically sent as editable fields. Therefore, navigate to UX -> Views -> Tickets_Detail and select the columns you want to make editable under Quick edit columns. In this case, these are "Resolved" and "Notes" and, if applicable, the columns that you have additionally added.
Limitations - What to consider
Sending dynamic emails in AppSheet is a new feature and still has some limitations in its early stages:
- Receiving dynamic emails is only supported by Google Gmail clients
- You can only send dynamic emails to recipients within your domain
- There is a limited selection of possible views (currently only shape and detail views)
- There is a limitation of possible column and action types
- You can't send dynamic emails to Google Groups
- The dynamic part of the e-mail is suppressed by forwarding
- Dynamic emails are interactive for 30 days, after which you can only make adjustments in the app
- Dynamic emails should be enabled in Gmail settings

Dynamic email combined with the no-code AppSheet platform can save you or your employees a lot of time in the workday. Complete tasks directly in Gmail without having to go into the app. In addition, many other use cases are conceivable besides an IT ticketing system. Whether it's applying for vacation or handling sick leave - AppSheet helps simplify daily work.
Get started with us
We're here to help you identify use cases and provide training for your employees on using AppSheet. Check out our AppSheet training programs or feel free to contact us directly.