I come from a software development background. Well, actually a testing one. I used to be a tester and have carried this mindset with me for over a decade now while I moved first into development and then later into more ops and infrastructure related topics.
What has always annoyed me about infrastructure automation were the long feedback cycles. As a developer - especially one with a Java background - I was so used to getting immediate feedback because writing unit tests and running them all the time is second nature. I don’t even remember the last time I wrote a piece of backend code and manually started the application to see that it works. It is just not something that you ever do as a backend developer. What a waste of time. And much too risky as well. Why would I trust myself to be able to perform the same mundane step in the worst case dozens of times over a longer period of time, while mentally keeping track of every single change I made. I’m doomed to make a small mistake at some point and not catch the bug. Also, the mental overhead of remembering all the different test cases is just not worth it. But I digress...
Lately, I have been using the AWS Cloud Development Kit (CDK) a lot to set up infrastructure on AWS, and I am so happy about the build-in test support. Not only did it save a lot of time already, but I also really like that there is now (finally) a way to actually document intent. In this article, I want to share some of my learnings and findings with you about how to use the testing capabilities of the CDK.
Note that this article is not an introduction to CDK itself. If you are new to CDK, you might want to check out our brief primer on CDK, published as a companion piece to this article. It should give you enough background information to be able to follow this article even without prior CDK knowledge. I do assume basic familiarity with AWS CloudFormation though.
Before diving in, a brief clarification of the terminology used in this article for the different types of tests.
Test Terminology
There are three different ways of testing in CDK according to the WS documentation: fine-grained assertions tests, validation tests and snapshot tests. I personally find the difference between the fine-grained assertions tests and the validation tests a little bit obsolete. They both test certain aspects of the code, and for my way of thinking it doesn’t matter so much if the code under test is code that only uses the CDK API (fine-grained assertions tests) or “regular” code that is used to parameterize the calls to the API (validation tests). On top, I can imagine other functionality that needs to be tested, e.g., loops that don’t fall neatly into either of those two categories. Thus, I will not distinguish between those two types of tests going forward and will just call them unit tests in order to differentiate them from the snapshot tests.
Our Example
We are going to use a simple S3 bucket throughout this article to show the available testing methods and their use cases. We will set some basic properties on the bucket (e.g., the name), apply some tags to it and configure the removal policy. I have tried to always choose the most minimal example I could think of, since the focus of this article is to show the testing capabilities of the CDK, not the CDK itself.
Our language of choice is TypeScript. It is at the time of writing the only language that supports testing. Just for this fact alone, I would always recommend to treat TypeScript as the first choice when deciding on the CDK language and only use another language if you have strong reasons for it. The testing library used is Jest.
So, let’s finally see some code! Below is the CDK snippet that creates the S3 bucket. I’m showing the complete stack here for context but going forward will only show the relevant part. You can find the complete code in this repository which also contains a dedicated tag
for each section of this article.
Note that all examples use Version 1 of the AWS CDK because Version 2 is still in Developer Preview at the time of writing.
In the remainder of the article I will show how to write unit tests and snapshot tests for this bucket, making configuration changes to it as we go along and explaining the different testing methods available in the CDK; and starting with some very simple assertions of single properties, moving on to test different kinds of attributes and ending with testing the complete template.
Before we start though - a brief interlude: What I found quite confusing in the beginning (might be me, might be my Spring Boot background fighting Node ecosystem or bad CDK documentation...) is that the official AWS documentation uses different methods for the assertions than the sample code that is auto-generated when creating a new CDK app via cdk init
.
In case I’m not the only one confused by this - here is an explanation. The main library used for assertions is @aws-cdk/assert. It provides all functionality that can be used inside CDK unit tests with this format expect (stack).to(someExpectation(...)) This library is used directly by the auto-generated sample code, e.g.
The examples in the official documentation use custom matchers defined in @aws-cdk/assert/jest which basically provide some syntactic sugar on top of the other ones, e.g. instead of writing expectCDK(stack).to(matchTemplate(...)) you can write expect(stack).toMatchTemplate(...). I will cover their different use cases in more detail later. But let’s start with writing the most simple test first.
Unit Tests
How to Write A First Simple Test
Starting off, there is not yet much to test. So, let’s add the test skeleton:
All this test does is to verify that the stack actually contains an S3 bucket by using the toHaveResource method. It does not check any attributes yet. However, it at least ensures that the stack contains an S3 bucket and will fail with the following message if someone deletes it from the stack:

How to Test Resource Properties
Let’s move on and write an actual test testing a property. For the sake of simplicity, let’s write a test that checks the bucket name. Let’s do some TDD-style programming and first write a test for the expected behavior.
As expected - the test fails because we haven’t set the bucket name in our example code yet

As a side note: What you can see here - and might consider a limitation - is that the test checks only the generated CloudFormation output. It does not check the actual bucket name that would get assigned if the bucket gets deployed. It is a unit test after all.
Now let’s add the bucket name in our stack:
And tada - success!

What would happen if we picked a bucket name that is not allowed by S3, e.g. one containing upper case letters?
The test fails with a quite detailed error message.

This is in my opinion one of the huge benefits of using CDK. Fast feedback! Getting this feedback took 23 milliseconds. Compare that with pure CloudFormation which would take several minutes: you have to upload the template, wait for the deployment to start and finally fail. And on top of that even with a less detailed error message.
Since bucket names are often not static but contain some dynamic values, let’s next set the bucket name dynamically by including the environment name in it e.g. my-bucket-production. The environment name will be passed as the first parameter to the bucket stack (btw I’d love to learn more about how different people parameterize. I’ve tried several approaches now but am not completely satisfied with any of them so far.).
I extended the test with the expected behavior and - as expected - it fails because the actual name and the expected name don’t match (yes, I admit I'm not a TDD purist, I already extended the constructor).
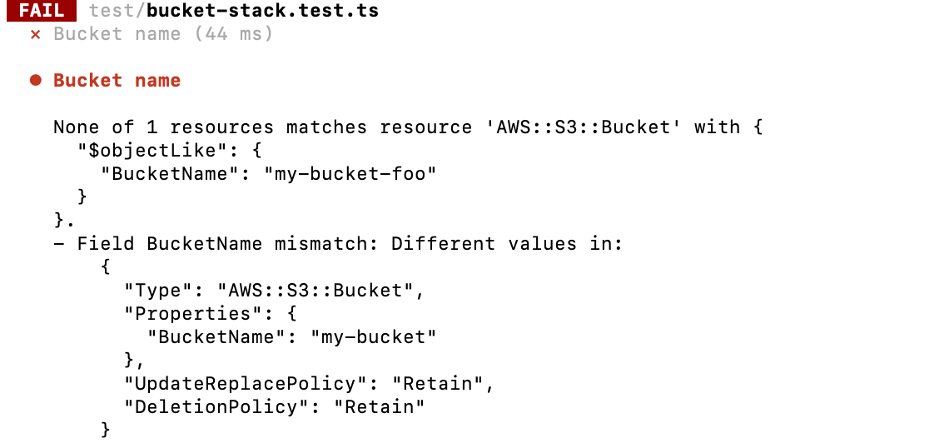
The test passes after adapting the code to set the bucket name to the desired format.
And even though this example is quite simple so far, it already gives a first glimpse into how powerful the CDK with its actual programming capabilities can be.
How to Test Array Resource Properties
While we’re at it and messing with the environment - let’s add the environment name as a tag as well. This will be used to show different ways of how to test array properties.
Let’s add a new test for testing the tags. I’ll take the chance and refactor a little and introduce a section for all tests that are related to environment-specific settings that contains the previously created test for the bucket name and the new test for the tags.
The new test for the tags is at this point almost identical to the test for the bucket name; it just tests a different property. What you can clearly see here is that each test only tests the properties specified and ignores the rest, i.e. the tag test does not care about the bucket name and vice versa.
The new test fails as expected since we did not assign any tags yet to the bucket. But what is actually quite nice is that because of the way the tests are structured now, you can see immediately that something is wrong with the tags and not the bucket name:
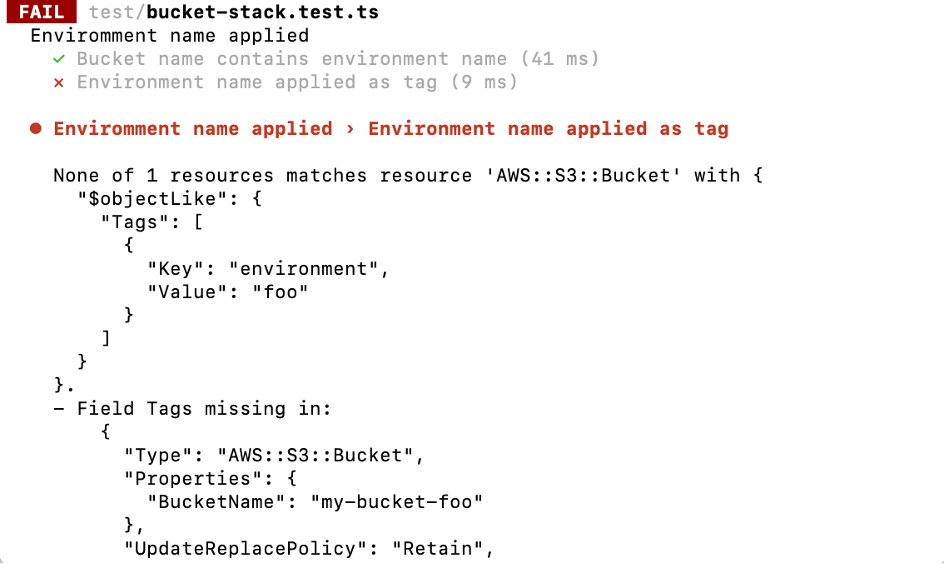
After adapting the code, the test passed as expected:

Another side note: In this example you can see a limitation of the CDK’s testing capabilities. Or at least something that becomes annoying over time. The code assigning the tags provides a nice abstraction layer over the underlying CloudFormation resource representation. You don’t need to know how tags are represented in CloudFormation. However, in order to write the test, you need to know that the CDK tags are represented internally in CloudFormation as an array of objects with Key and Value attributes. Otherwise, you cannot verify that they get assigned correctly. This is actually one area where I would love for improvement in the testing support and have similar abstraction layers as in the main CDK code.
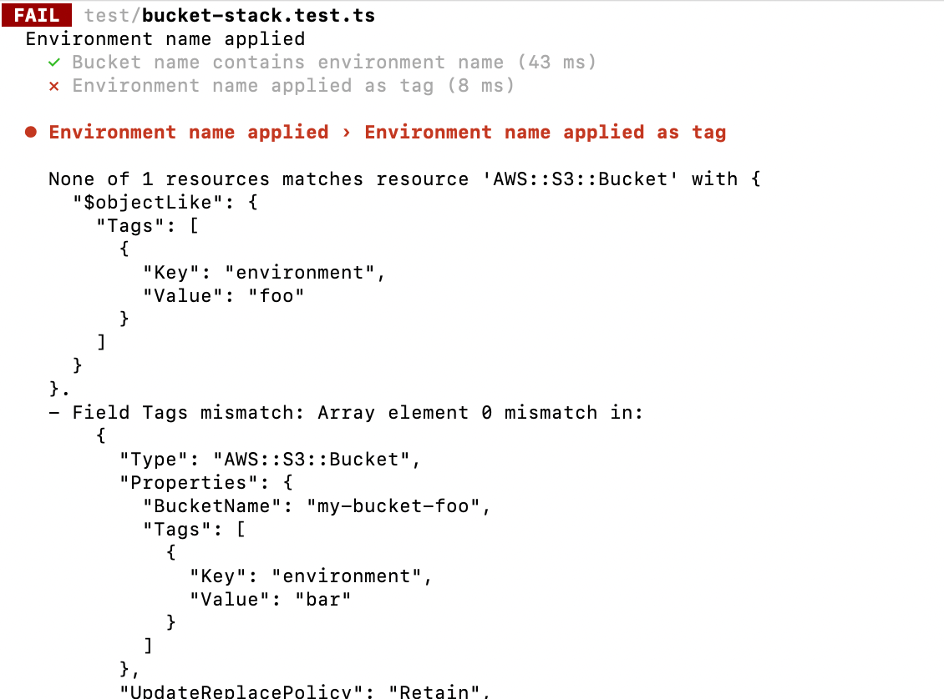
But coming back to our example. We added a tag for the environment and the corresponding test passed. So far, so good. What happens if someone changes the tag, removes the tag or adds another one? Have a look at the different outcomes.
Tag Key or Value Changed
Tag Removed
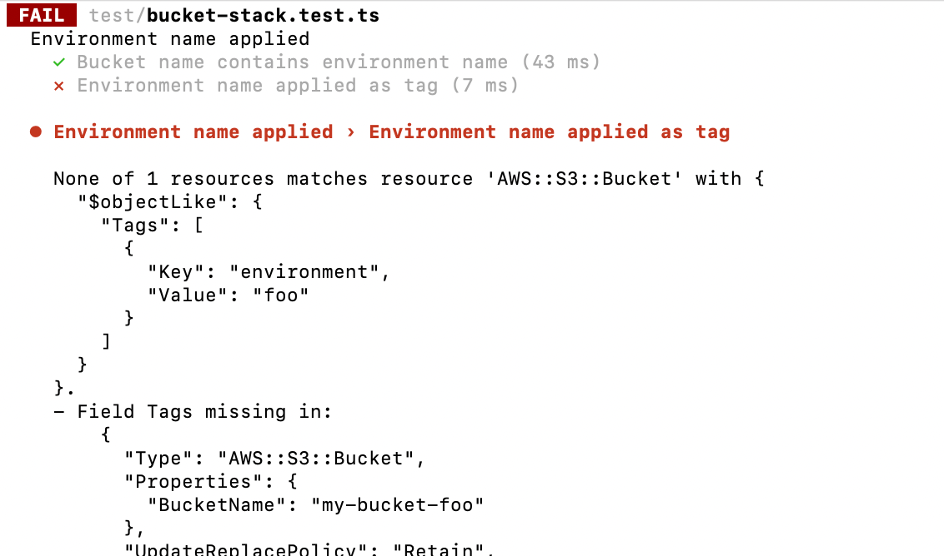
Tag Added
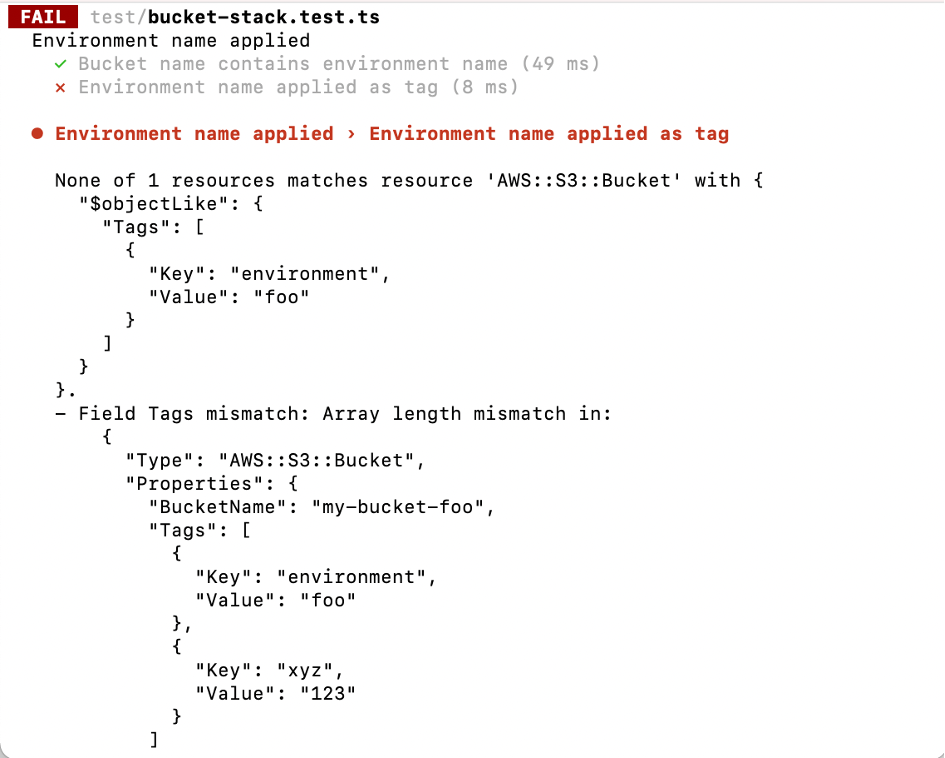
Is this the expected behavior? For the first two cases (change and removal) for sure. The error messages could be improved a little bit maybe. You need to look at the details to really understand what is going on. But other than that - it’s fine. But what about the failure when adding another tag? We actually only want to be sure that the environment is included in the list of tags. If additional tags exist, we don’t care. And we definitely don’t want to update our tag test with every change in the tag array.
For a case like this, the method toHaveResourceLike comes in handy. It passes if the actual values are a superset of the expected values, whereas toHaveResource only passes if the values are an exact match.
Thus, when we change the test to use this method instead, it passes:
However, there is yet another shortcoming: the order of the elements in the array matters. If the additional tag is not added after but before our environment tag, the test fails even when toHaveResourceLike is used:
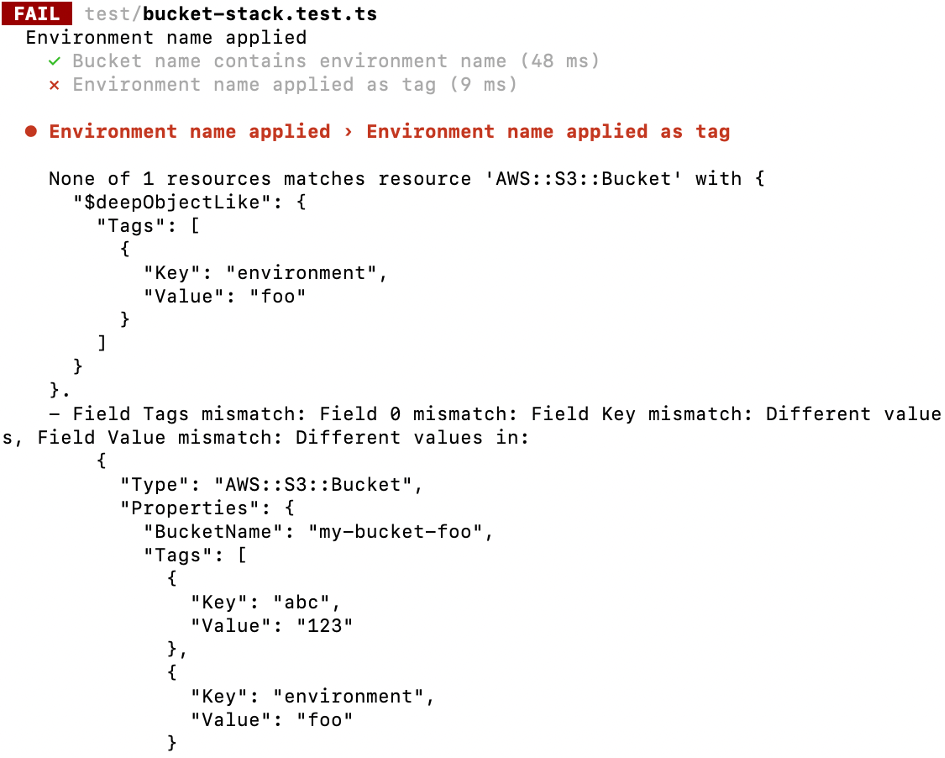
This is the point where switching to the underlying assertions from @aws-cdk/assert makes sense. It provides a lot more functionality when it comes to matching content inside the resources. E.g. in this case the arrayWith matcher can be used. It checks that the array contains the given element. Now the test will only fail if either the environment tag gets completely removed or if it contains wrong values. Anything else can happen with the tags property and the test won’t be affected.
There are several more matchers available and also the option to capture output. Maybe something for another blog post...
How to Test Other Resource Attributes
Until now we have only verified resource properties such as the bucket name or the bucket tags, and that’s where most of the action is anyway. However, sometimes you want to test other resource attributes as well.
Something I have been doing quite often is to change the default removal policy, which is by the way something I had to get used to when switching from CloudFormation. In fact, the default in CloudFormation is that resources get deleted, whereas in CDK it is the reverse: resources get retained. And it is a sensible default for production environments. However, for other environments it may not always make sense that way. E.g. imagine an ephemeral environment (a.k.a. feature environment a.k.a. review environment) that gets automatically created for each pull request and gets destroyed again after the pull request has been merged. In that case, all resources of the stack should always be destroyed when the stack gets destroyed and not be retained.
So let’s assume we want to always delete our bucket and thus the two relevant removal policy attributes DeletionPolicy and UpdateReplacePolicy should be set to Delete. The naive way to test for this is to just add the attributes with the desired values to the expected outcome of the test. However, the test fails with the error message Field UpdateReplacePolicy missing, Field DeletionPolicy missing as shown below.
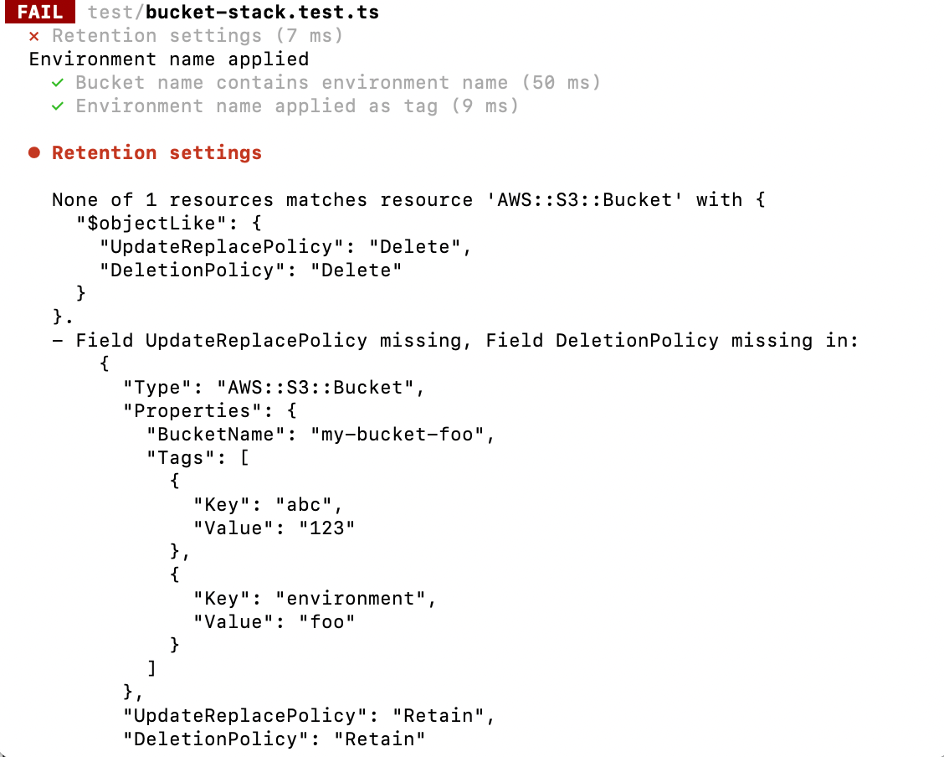
Why this happens becomes apparent when looking at the generated CloudFormation template. It looks like this:
You can see that the two relevant attributes DeletionPolicy and UpdateReplacePolicy are not part of the Properties section of the template, which is the section considered by default by the toHaveResource method. Other sections are ignored. Luckily, this can easily be changed by setting the ResourcePart parameter to CompleteDefinition. Now the complete resource will be verified.

And after the stack is changed accordingly, the test passes:

How to Test (Parts of) the Template
One last unit test method I want to discuss before moving on to the snapshot tests is the toMatchTemplate one, which lets you verify the complete synthesized template or a subset of it. To be honest I haven’t yet had too many use cases in which I used it because its usage seems to lead to quite some maintenance effort down the road.
The two use cases I came up with so far are
- Verify the logical resource ID in case there is some custom code for it.
- Verify that the template contains no resources that require a replacement.
This is what a test looks like that verifies the complete template:
There are three configuration options that configure how strict the matching is performed: MatchStyle.EXACT (the default), MatchStyle.SUPERSET and MatchStyle.NO_REPLACES.
With MatchStyle.EXACT, the test will fail if the actual template and the expected one are not an exact match, i.e. when you change anything in the template such as adding another resource, modifying the existing one or removing an existing one.
Examples:
- When an additional resource new s3.Bucket(this, 'OtherBucket') is added, the test fails and shows this diff
- When the existing bucket is deleted it fails and shows that it is removed and that it will be destroyed
- When an attribute is changed it fails and shows the difference
- When an attribute is changed that leads to the replacement of the whole resource e.g. the bucket name it fails and indicates this as well
The behavior is almost similar to MatchStyle.SUPERSET. The only difference is when an additional resource is added. In that case it will continue to pass since it only verifies sub-sections of the template. Note though that the complete resource is always verified, i.e. it is not possible to verify a subset of attributes of a resource. This is the main difference to the previously described toHaveResource method.
And then there is the third option MatchStyle.NO_REPLACES which will only cause the test to fail if there is a change that causes the resource to be replaced.
Let’s assume you make a lot of changes to this stack:
And remove all attributes except the name and add another bucket to the stack, resulting in this one:
With MatchStyle.NO_REPLACES the test will continue to pass.

But if you change the bucket name afterwards- which causes a replacement - it will fail:
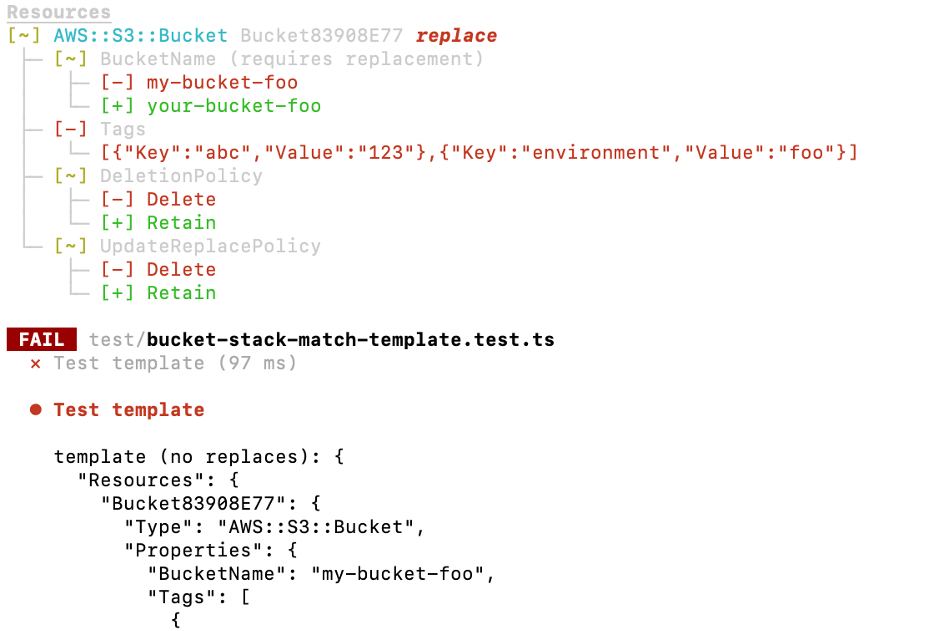
I find this setting the most useful. Having an early warning about a replacement can be quite helpful indeed! And compared to the other settings it doesn’t result in too much maintenance effort. You can have one test per stack that contains all the resources with only the properties that require a replacement. This test will fail if you make a change and force you to conscientiously accept the replacement by fixing the test. I would love to see this feature actually integrated into the snapshot tests because it would remove the need to manually create a copy of the template. And talking about snapshot tests… let’s close this section about the unit tests and move to snapshot tests next.
Snapshot Tests
Snapshot tests - as the name suggests - take a snapshot of the stack and compare it to the stored version. Under the hood it uses the snapshot testing feature of jest. There is no abstraction layer on top so the functionality is quite limited.
It is quite straightforward to write a snapshot test since all assertions are done automatically.
The first time you run it, a new folder called __snapshots__ will be created and the snapshot will be stored in it.

On each subsequent run, the synthesized template is compared against the stored snapshot.

If you change the template, the snapshot test will fail
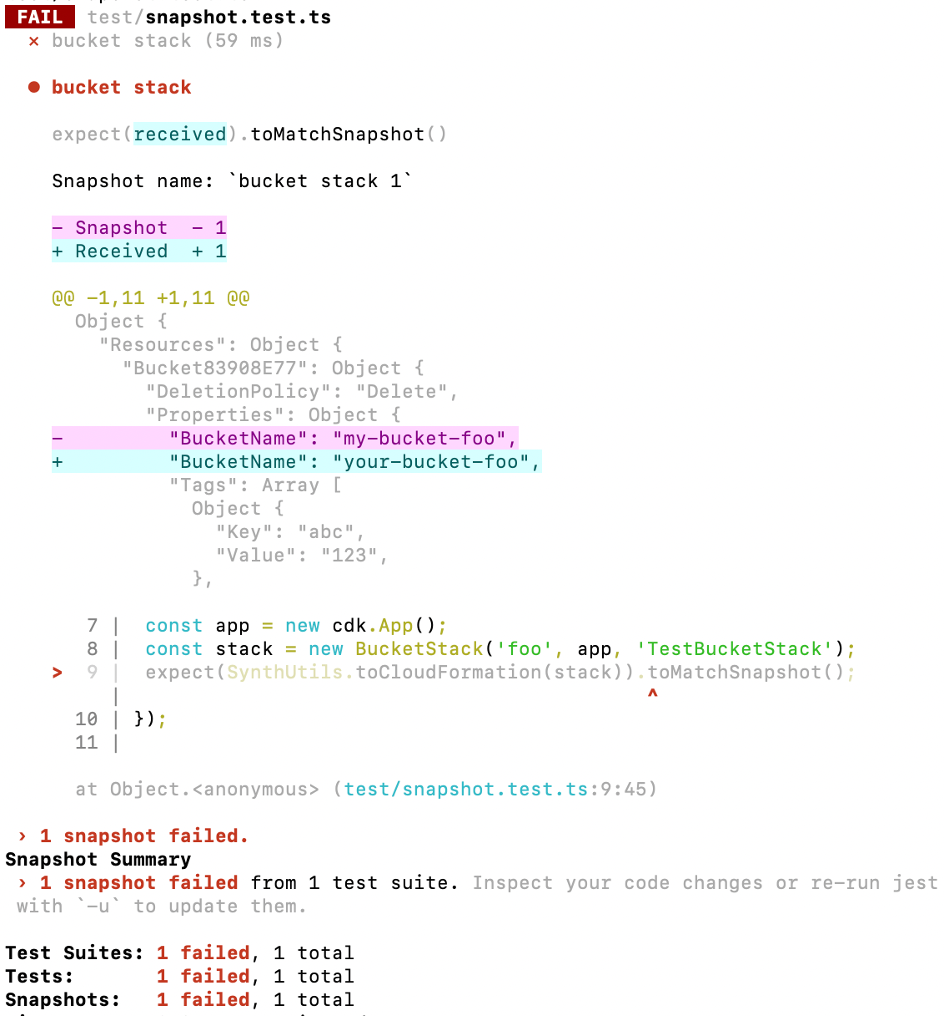
You can review the change and if it’s ok, you can automatically update the snapshot by running again with the -u option:

And that’s basically all there is to say about the snapshot tests. I do think that they could be vastly improved, e.g. by adding an abstraction layer and - as stated in the previous section - providing an option to only fail if one of the resources requires a replacement. Right now they are quite basic and should be used sparingly since they are very broad, don’t really document intent and might result in quite some maintenance effort. However, they can be considered a last safety net. In theory they can also be used for TDD style development. However, I found it hard to manually update the snapshot beforehand because the readability of the generated snapshot is not that good due to the serialization format and the file length.
Conclusion
This article gave an overview of the main testing functionalities provided by CDK. Some key takeaways:
- Having tests in place allows for fast feedback loops and ensures better maintainability down the road.
- The main methods to test resource properties and other resource attributes are toHaveResource and toHaveResourceLike. For more advanced use cases, matchers and captures provided by @aws-cdk/assert can be used.
- Use toMatchTemplate or snapshot tests to test the whole template or a complete subsection of it.
And while I’m super happy about the fact that those testing capabilities exist, I do see room for improvements, namely:
- Provide an abstraction layer for the testing library as well. You don’t need to know how CDK attributes map to the underlying CloudFormation attributes when defining the stack. However, once you move to the tests, you suddenly do need to know. This makes the tests harder to write, maintain and understand.
- Provide additional functionality to the snapshot tests, e.g. allow a setting that causes the test only to fail if a resource requires replacement.
- Better documentation.
Are you completely satisfied with the testing capabilities of the CDK or are you also looking for improvements? How is your experience with it in general? Looking forward to hearing your thoughts!